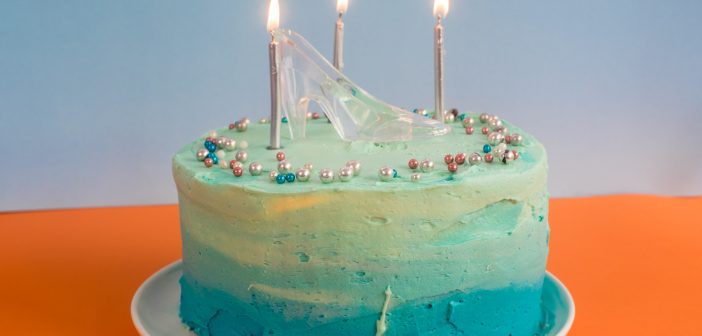
Some of you may remember that we recently put together an eBook of 10 great cakes that you can make yourself at home for well under $20 ($5.95) with our good friend Sarah from The Sugar Hit. We have decided to share a few with you on the site to inspire you.
This beautiful ombre technique is a great neutral base for whatever latest Disney character your kids are obsessed with. This dark-to-light blue could be perfect for Elsa from Frozen, Ariel from The Little Mermaid, or Cinderella. Think shades of red for Cars, shades of green for Tarzan, or even shades of black and grey for a Batman cake.
Ingredients
- 1 x Vanilla Butter cake Recipe (3 layers)
- 1 x Classic Vanilla Frosting
- 1 x Tube Blue Gel Food colouring
- Sprinkles, to decorate
Method
- Bake the cakes, and once they are completely cool, use a serrated edge knife to trim the layers flat. Place a dab of frosting on the cake stand or plate that you want to serve the cake on, and use it to anchor the first layer to the plate.
- Scrape just under a quarter of the frosting onto the layer and spread out evenly, right to the edge of the cake. Repeat with the second layer of cake, and then place the final layer on top.
- Press down on the layers, and using the frosting that squeezes out, plus a tiny bit more from the bowl, coat the cake in a very thin, messy layer of icing – this is called a crumb coat. Place the cake, uncovered into the fridge for 30 minutes to set.
- Take the remaining frosting and divide it between 3 bowls. Place one small drop of food colouring into the first bowl, two drops into the second, and three drops into the third. The idea is to create three distinctly different shades of blue.
- Once the thirty minutes is up, remove the cake from the fridge. Take the darkest shade of frosting and spread it over the bottom third of the edges of the cake. Then, take the next darkest shade, and cover the middle third of the cake. Finally, use the last bowl of frosting to cover the top, and highest edge of the cake.
- Once all the frosting is on, go back over the frosting with a palette knife, using long smooth motions with the knife to get an even finish, blending all the different colours together. Go around the edges first, cleaning the knife between goes, and then finish by smoothing off the top.
- Decorate with sprinkles, and anything else you want. Serves 10-16.
Video
We even made a quick video to show you how 🙂
For more great cakes like this check out our eBook of 10 great cakes that you can make yourself at home for well under $20 ($5.95) with our good friend Sarah from The Sugar Hit.

